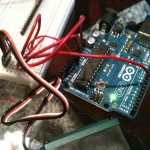
Used a 10k POT to control the 3 wire Vex servo. The two end pins of the POT went to 5V and ground. The middle connection of the POT was connected to the analog in 0 (A0). The servo was connected to the 5V (red), ground (black) and digital pin 9 (D9, white). Used the knob example from the Arduino.cc website to program the board. I was also able to print the Analog value of the POT by using the code from the AnalogReadSerial example.
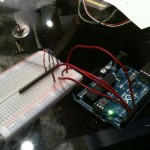
Bought a mini stepper motor with 5 wires. Its a Symbol Mini Stepper Motor run on 5V. I tried to use the schematic from this website where someone made a driver to run the motor. For some reason I couldnt get the circuit to work. Most likely it was the transistor or the resistor value. Instead, I tried connecting the motor directly to the pin out 2, 3, 4 and 5. Using the attached sketch file, I was able to run the motor. This motor did full rotation in 20 steps (1step = 18 degrees). Still needs more testing for speed etc. The original .pde file is set to move the motor in random direction and random speed. If you change the .pde file to use constant speed/direction use the following
Speed: 1 – 50 (50 being the fastest)
Direction: 1 – 20 (20 being a complete rotation)
Used a Vex 3 wire servo from VexRobotics. I used a small example code for Arduino called Sweep to see how far the servo can turn. I was happy to find out that it can do 180 degree instead of 100 degree.
(From Vex Robotics)
Rotation:100 degrees
Stall Torque:6.5 in-lbs
Voltage:4.4 – 9.1 Volts (Motor life will be reduced operating outside this range)
PWM Input:1ms – 2ms will give full reverse to full forward, 1.5ms is neutral
Started with a small project. I had a small audio relay that I purchased as a hobby project a few year back called Mini Vox & Relay. This kit lets you activate a relay when it hears a noise. I lost the microphone that it came with, but fortunately I found one in my box of “things” that worked. I was able to connect the relay to the 5V of the Arduino and the output to Pin 11. The modified the Blink code example and made it count 3 sounds/claps. After 3 counts an LED would turn on.
The problem I ran into was the relay stayed connected as long as the sound. While the relay was connected, the counter kept counting. I had to put a delay after the count so the relay had some time to disconnect to get around this problem. Another way to fix this issue would be to look for a low signal after a high to complete a full count. Â Personal note: Pull Up/Down resistor!
It all started when I saw this post on Lifehacker.com to make a “Snail Mail Notifier for your Smartphone”. The post is about making a iphone sms push alert that would let you know when someone opens your mailbox (to deliver mail etc.). The video tutorial originated from Make magazine. It talks about this micro controller called Arduino.
“Arduino is an open-source electronics prototyping platform based on flexible, easy-to-use hardware and software. It’s intended for artists, designers, hobbyists, and anyone interested in creating interactive objects or environments.” via Arduino.cc
I started working on small robotics projects during my university (URI). Most of the work was with Lego Mindstorm. Here is a link to the project Sweet Tooth. The robot started looking like a elephant first and the trunk/teeth had the touch sensor which made it change direction when touched. You can read more about it on the page. The project ended up being a six legged transformer type robot which would change into a three wheel bike and drive away when someone/something hits the bumper.