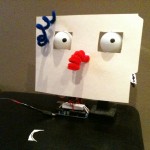
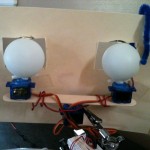
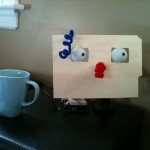
This is a recreation of a project that I saw on todbots website. It was called “scary shifty servo eyeballs“. Mine just has a face over it made out of cardboard paper. Its a great way to reuse those yellow folders/binders lying around in your office. I used 2 x HXT 500 servos for the eyes and 1 x HXT 900 servo for the neck/face. The code was exactly the same.
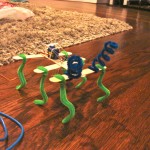
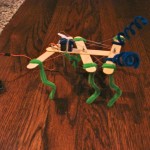
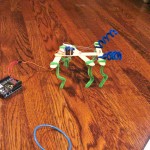
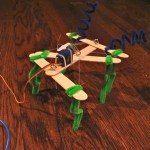
I saw this “Popsicle Bug” robot on this website. I was very inspired by it and wanted to make one of my own. It reminded me of my old lego projects that I did in college. Except this was very light weight. The original maker left it very organic which is what I wanted to do and its fairly inexpensive to make. I used regular thread from my wife’s stitching box instead of a fish line. You can pretty much use any string/thread thats strong enough to handle the tension.
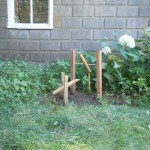
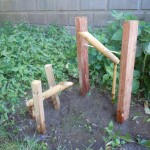
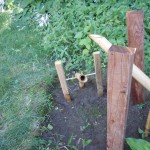
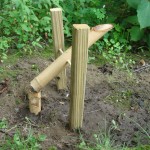
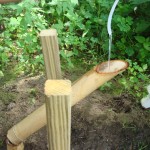
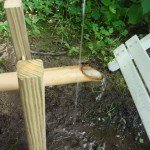
I am working on a water feature or a contraption as my wife called it. The idea is to flow water through different objects without the use of power or electricity and create different movements. Eventually, I want to collect rain water in a reservoir of some sort and let it flow through.
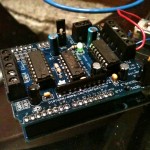
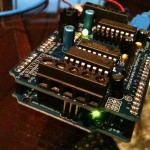
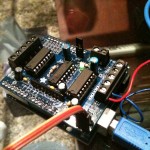
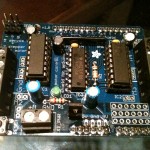
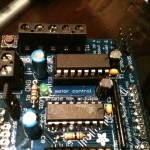
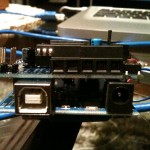
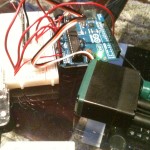
Finally had to give in and get a motorshield for the Arduino. I purchased it from RobotShop not knowing that it was a kit (i.e. you build it yourself). I should have read the title of the item a little better. It was fun to build the shield with these instructions PDF. It helped me build up some soldering skills. Fortunately, I bought some soldering flux paste from Radio Shack which helped me keep my work clean. The shield lets me power up to 4 DC motors, 2 servos or 2 stepper motors. You can use it to power bigger motors using an external power supply. The shield has 4 H-Bridges provided by L293D chipset.
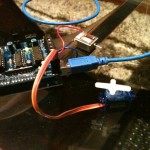
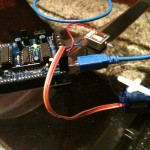
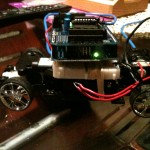
I set it up with a RC car which has 2 motors for steering and forward/reverse movement.
All the instruction on how to build the motorshield and how to use it with the library are available on this ladyada.net website
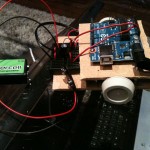
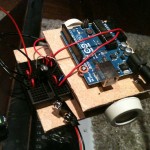
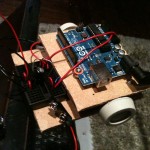
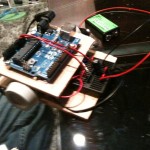
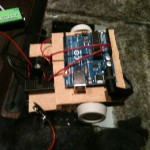
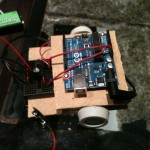
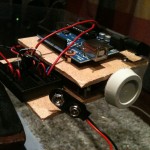
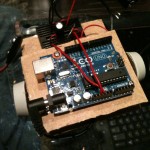
Second attempt. I cut out a piece of hard cardboard (almost plywood consistency) which I found from the back of a old picture frame. Made the mounts for the motors from a sheet of aluminium. I had a set of screws and risers that are used for installing motherboards inside a computer case. I traced out the holes and used the risers to make a platform for the arduino board.
Comments Off on Arduino: Wheel Robot (Attempt 2) | posted in Arduino
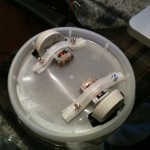
Tried to use a yogurt container top, cut out two slots for the wheels. Use two tiny 5V motors with rubber pads for the wheels. The container top was not regid enough to hold all the components.
Comments Off on Arduino: Wheel Robot (Attempt 1) | posted in Arduino
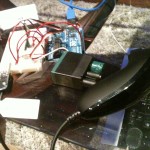
I combined the push button example and the tweet library example to create a “twitterbutton” which will tweet a message and alert my iphone when a button is pressed. I needed to get a Auth code from Twitter to allow the Arduino to send a tweet. The instructions are straight forward and are on the Tweet Library page. The alerts are sent to the iphone because I “follow” the twitter account front another account and have it set for mobile alerts. All the testing are under Twitter account settings.
Note: Use a 10k resistor as a pull down for the push button (brown, black, orange, gold).
You will need to get the Twitter Library 1.2.2 and put them in the ~/Documents/Arduino/libraries (Mac) or My Documents\Arduino\libraries\ (Windows). Also, you will need EthernetDNS library and put them in the same folder. Arduino Playground Reference TwitterLibrary.
Just got a Arduino Ethernet Shield from ebay. It uses a Wiznet W51000 chip. Its pretty easy to assemble to the Arduino Uno board, you just line up the pins and snap it into place. I also used the Webserver example to test it. The webserver example display the value of the analog pins A0 to A5 on a webpage.
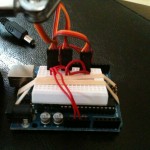
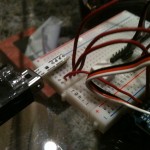
I used the code from this website to control a 3 wire servo. The todbot blog seems to have lot of projects. The wiring is done pretty much the same way as the WiiChuck before. The Servo pin is connected to D7.
Wii NunChuck
Red – 3.3V
White – Ground
Green – Analog In 4 (A4)
Yellow – Analog In 5 (A5)
Servo
Red – 5V
Black – Ground
White – Digital 7 (D7)